 Welcome to Part 6 of my Horizon View and Windows 10 Image Building Series. So far in this series we’ve built a virtual machine and customized it for use with Horizon View and Windows 10. We installed Windows 10 (1803) Enterprise, installed VMware Tools and ran Windows Updates. We applied many customizations to Windows settings and options. We’ve staged the Agents, Scripts and drivers. We downloaded and staged the VMware OS Optimization Tool and ran it using my custom template. Lastly we installed necessary software and drivers on the image.
In this article we will be installing all the previously staged Agents including the View Agent, View Direct Connect agent, UEM agent and the App Volumes agent. We’ll also be attaching a vGPU to the Pool Image VM and installing the NVIDIA GRID Drivers. Finally we’ll be completing the Windows 10 (1803) image and making it ready to deploy to a Horizon View pool. I’ll be using a numbered list so you can easily follow this guide while adding detail around specific sections where necessary.
Agents & NVIDIA GRID Drivers
We’ve just taken a snapshot in the last step of the last article but if you haven’t been following along you should take a snapshot now. The idea being that you can go back before you install the agents to perform updates without potentially causing issues to the agents. This of course requires you to install the agents again.
If you happen to update the VMware Tools, update other agents or even install Windows Updates, any one of those has the potential to cause problems with the agents. If you do those types of updates I’m suggesting here that you fall back to the snapshot before you installed the agents. You then run the updates or changes and slip in the updated agents and reinstall following the below process. This will guarantee you aren’t corrupting the agents and that you’re installing them in the proper order.
Speaking of proper order, there is a very specific and required order to install Agents and in this case the NVIDIA GRID drivers. If you don’t follow this order it’s very possible your Horizon View desktop will not work correctly.
- Agent & driver install order
- VMware View Agent
- VMware View Direct Connect Agent (optional)
- User Environment Manager (UEM) Agent
- App Volumes Agent
- NVIDIA GRID Driver
- View Agent
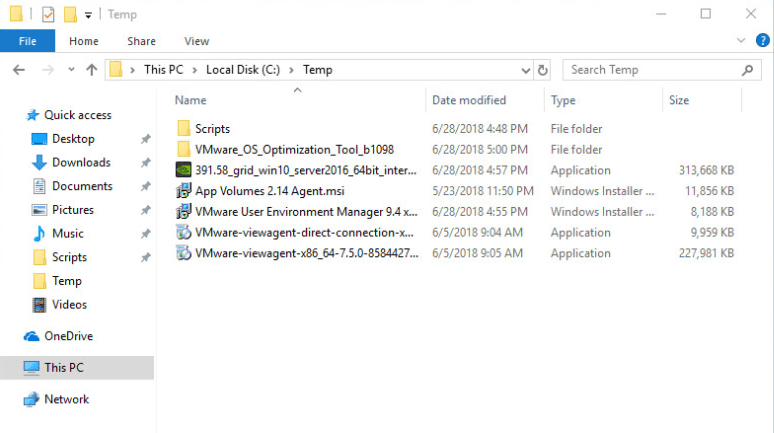
- Login as the local Administrator.
- Navigate to the folder you previously staged the agents and drivers in.

- Right-click the View agent installer and click Run as administrator.
- The View agent installer may restart the VM. You will have to log back in as the local Administrator and run the installer again if that happens.
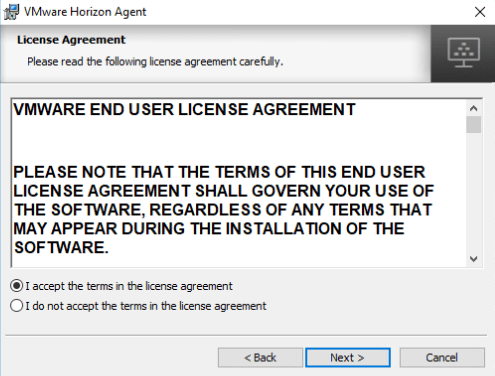
- Click Next.

- Select I accept the terms in this license agreement and click Next.

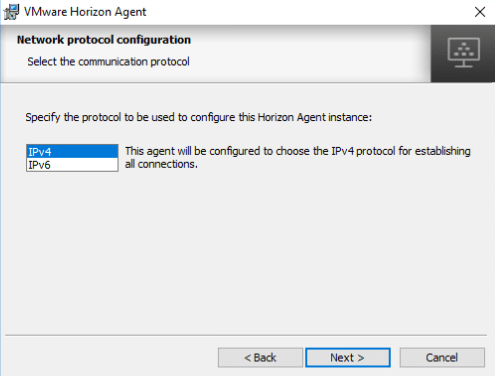
- Select IPv4 and click Next (Unless you’re using IPv6 of course).

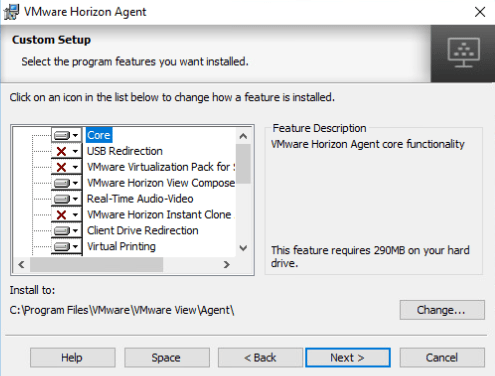
- Select or Deselect the options specific to your environment. I usually Enable USB Redirection, Disable Client Drive Redirection, Enable Horizon Performance Tracker, Disable Persona Management and select either Linked Clones or Instant Clones. Your selections will certainly vary here. Click Next to continue.

- If you also selected USB Redirection you’ll get a note to refer to the Security documentation here. Click Ok to continue.
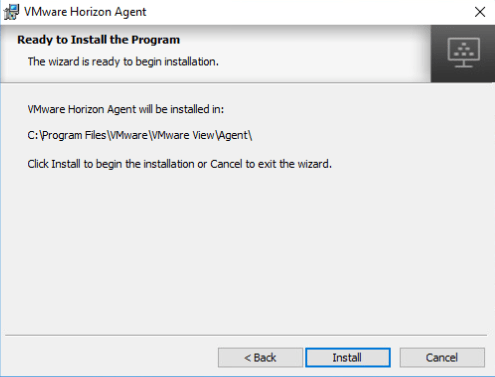
- Click Install.

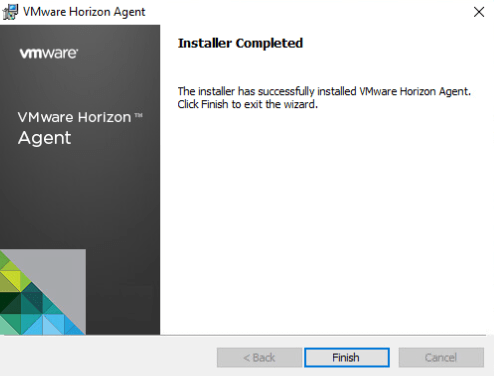
- After the installer is done click Finish then Yes to restart the VM.

- VMware View Direct Connect Agent (optional) – I recommend this if you’re using vGPU since once you attach a vGPU and get the drivers installed the console doesn’t work at all.
- Login as the local Administrator.
- Navigate to the folder you previously staged the agents and drivers in.
- Right-click the View Direct-Connection agent installer and click Run as administrator.
- Click Next.

- Click I accept the terms in the License Agreement and click Next.

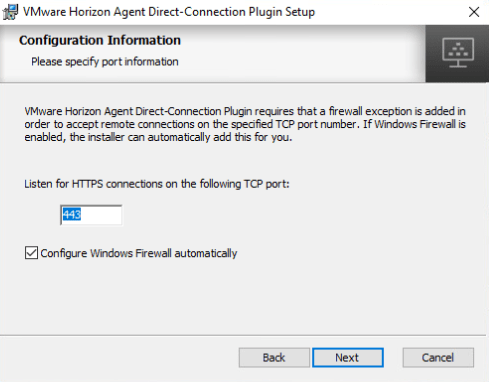
- Leave the TCP port as default of 443 and place a check in Configure Windows Firewall automatically then click Next.

- Click Install.

- When the installer completes click Finish then Restart Windows.
- User Environment Manager (UEM) Agent
- Login as the local Administrator.
- Navigate to the folder you previously staged the agents and drivers in.
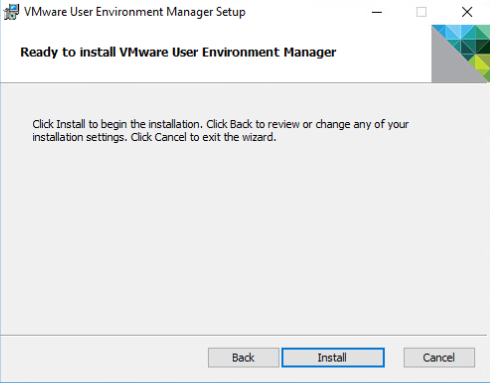
- Double-Click the VMware User Environment Manager MSI Installer then click Next.

- Click I accept the terms in the License Agreement and click Next.

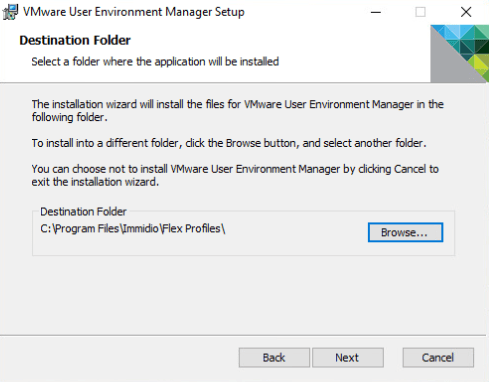
- Leave Destination Folder as default and click Next.

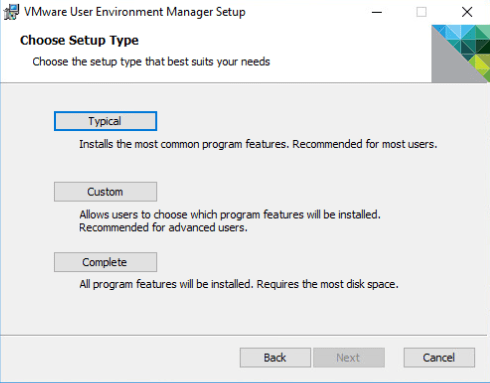
- Click Custom.

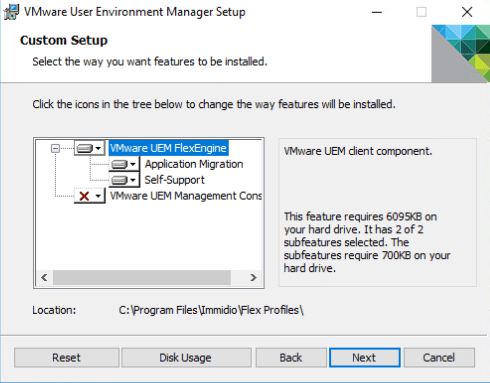
- We don’t need UEM Management Console here so it should be deselected then click Next.

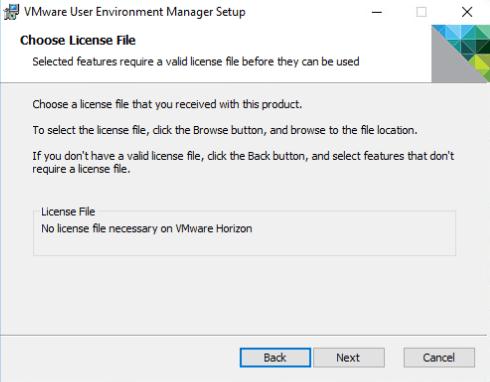
- There is a step here that talks about choosing a license file for UEM but there’s no actual selection because it says No license file is necessary on VMware Horizon so we just click Next.

- Click Install

- Click Finish then Restart Windows.

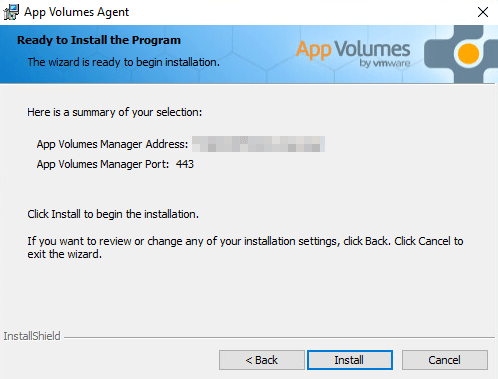
- App Volumes Agent
- Login as the local Administrator.
- Navigate to the folder you previously staged the agents and drivers in.
- Double-Click the VMware App Volumes Agent MSI Installer then click Next.

- Click I accept the terms in the License Agreement and click Next.

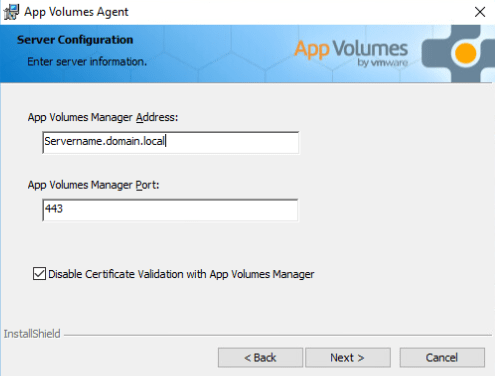
- Type in the App Volumes Manager Address. You can use the FQDN or IP address here.
- The App Volumes Manager Port should be the default of 443.
- Place a check in the Disable Certificate Validation with App Volumes Manager box and click Next.

- Click Install.

- Click Finish and Yes to Restart Windows.
- NVIDIA GRID Driver
- If you’re not using vGPU with NVIDIA GRID hardware you can skip to the next section to finalize the image.
- This one’s a bit tricky. We have to add the hardware to the VM before the driver will install. Once you add the hardware and get the driver installed the console will no longer work. This means we must use View Direct Connect or RDP. I’ve used RDP and Direct Connect succesfully so either works.
- Shutdown the VM.
- Open the vSphere Web Client.
- Right click the Pool Image VM that you’re working on and select Edit Settings.
- At the bottom select New Device then select Shared PCI Device and click Add.

- Select the vGPU profile you need and are licensed for and click Ok. This will add the vGPU to the Pool Image VM.

- Power on the VM and RDP to it using the local Administrator account.
- Navigate to the folder you previously staged the agents and drivers in.
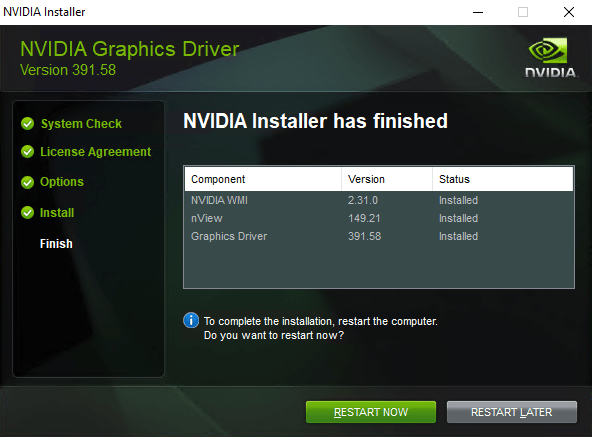
- Right click the NVIDIA GRID Windows 10 Driver install and click Run as administrator.
- Set the path to extract the driver install to the same folder where you staged the other agents and drivers with a sub folder structure like the picture. After it extracts it will start the driver install automatically.

- Click AGREE AND CONTINUE.

- Click Custom (Advanced) and click Next.

- All 3 options should be selected under Select Driver Components. Also put a check on Perform a clean installation then click Next.


- Click RESTART NOW after the driver finishes installing and it will restart the VM.

- Reconnect over RDP as the local Administrator account.
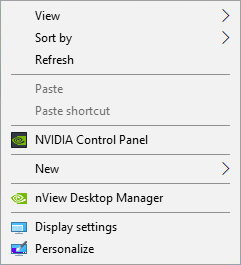
- Now we need to validate that the driver installed and has engaged the vGPU. Right click anywhere in an open area on the desktop and select the NVIDIA Control Panel. If this option doesn’t show up you either didn’t install the drivers or the vGPU isn’t attached to the VM. It’s also possible that the host driver version doesn’t match or that you’re not getting a license from the NVIDIA GRID Licensing Server.

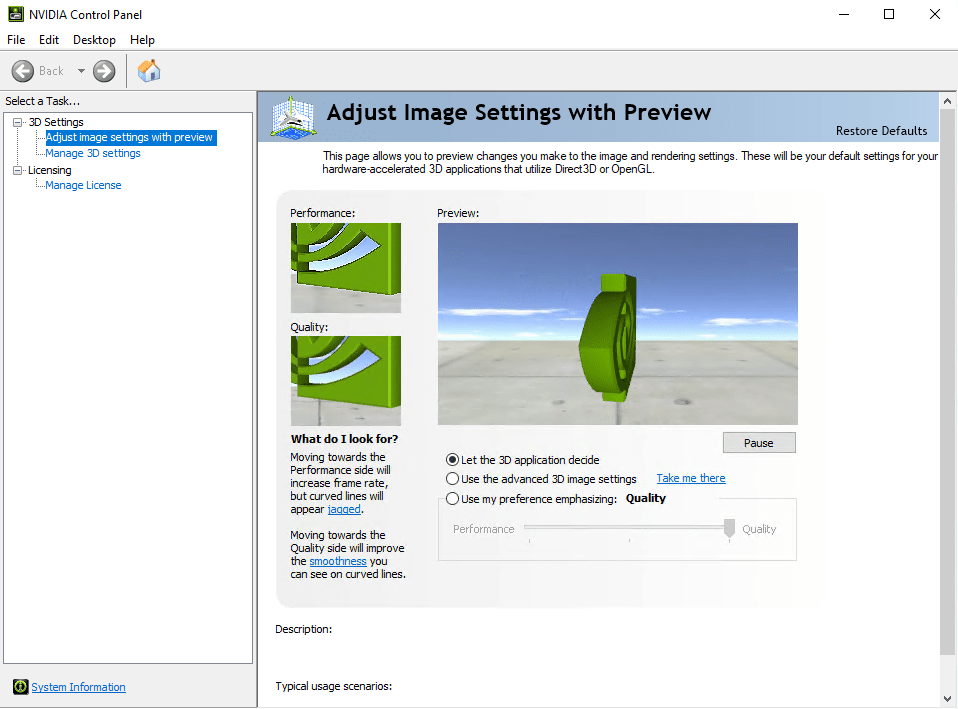
- The NVIDIA Control Panel will open to the Adjust Image Settings with Preview section. If you see the spinning NVIDIA logo this validates that the vGPU is working. You can also check the Device Manager and see if the NVIDIA GRID vGPU shows up under Display adapters.

- Delete the extracted NVIDIA folder from the staging folder.
- NOTE: Just because we have it working in RDP doesn’t mean it’s meant to work well in RDP. The spinning logo may stutter quite a bit in RDP. You need to be connected with Horizon View over PCOIP or Blast Extreme to see the real performance here. In Horizon View the logo should spin smooth.
- Image Completion
- If you installed the vGPU hardware and drivers you must RDP or use the Horizon View Direct Connect agent to connect to the VM to continue.
- If you’re not using vGPU then you can continue using the console to the VM to continue.
- Run Office 2016 Activation Check Script you should have staged from a previous article in this series and select the options to Rearm Office 2016.
- NOTE: If you have an Anti-Virus/Anti-Malware solution that requires some extra configuration or runs a tool to generalize the product then you need to run it now or include it in the VDIDesktopShutdownScript.bat in the next step.
- Run the VDIDesktopShutdownScript.bat from an Administrator elevated Command Prompt.
- Take the final snapshot for this VM and make sure you set a descriptive title and description.
- Can you believe it? The Image is done and ready to be deployed to a pool!


Agents & NVIDIA GRID Drivers Complete
We’ve successfully installed the necessary Agents & the NVIDIA GRID Drivers on the image. We’ve validated that the vGPU is working as well. Finally, we completed the image by rearming Office 2016. running the shutdown script and taking the final snapshot. We now have a set of two images. One is the Base Image that is a fully optimized and clean Windows 10 (1803) image with the agent staged. The other is our Pool Image that has all the drivers, agents and applications configured and ready to go. From that Pool Image we can now deploy a vGPU enabled Windows 10 (1803) VDI desktop pool into Horizon View. Congrats! Great Success!
So that’s it! Series Over right?!….
No, not even close. I’ve got a bunch more in the works in the coming weeks/months. I’m going to talk about my methodology around the images and snapshots and how to use them effectively. I’ll go into some detail with App Volumes AppStack design and UEM profiles. I’ll detail Group Policies and Active Directory components and I’ll show you the Horizon View Pool settings to use. Thanks for reading and stay tuned for the continuation of this series.
Hello,
sure about the order of AppVolumes and vGPU? I usually to install AppVolumes as last thing since the file system filter can cause some issues with installation.
Thanks for reading and commenting! The App Volumes agent in my experience doesn’t cause any issues with the NVIDIA GRID vGPU driver. Normally without vGPU you’re absolutely correct that the App Volumes agent should be the last thing installed. That being said, I haven’t seen any clear documentation stating to install them in one order or another. There is a VMware KB https://kb.vmware.com/s/article/2118048 that details the agent install order for everything except vGPU though. I like to do the vGPU driver last because when you do enable vGPU and install it you can no longer console into the image so I leave that as a last step. As I said earlier I haven’t seen any issues caused by doing it that way. If you see a document or KB stating otherwise please reply and let me know as I would be interested in seeing that and updating the article accordingly. Thanks for reading!
Thank you for a great article series! Very nice layout and informative. One question I have is using Windows 10 1803 with NVIDIA GRID. According to the latest NVIDIA documentation, 1803 isn’t supported yet. Have you run into any problems using NVIDIA vGPU with Windows 10 1803?
Thanks!
Thanks for reading and commenting! Windows 10 1803 isn’t supported yet and I forgot to call that out in my article. I tested it and just ran with it when it worked. I have not run into any issues with it at all. So far it’s been really solid. Apparently the 6.3 drivers are going to have full 1803 support but I haven’t seen a release date yet on those.
Thanks Shawn! I will try 1803 with NVIDIA vGPU and see how it goes with testing. I am not sure on why it wouldn’t work. Also, have you read the recent VMware article on image optimization at: https://techzone.vmware.com/creating-optimized-windows-image-vmware-horizon-virtual-desktop
They do some steps I was never aware of like running DISM, using sdelete to zero the disk, compact the OS, etc. They are utilize mandatory profiles for supposedly faster logins. What are your thoughts on using mandatory profiles for this (stored on a network share, and assigned via GPO).
Thanks for posting that link I hadn’t seen that yet. I have never run the DISM like that before since I thought it kinda does the same stuff that running Disk Cleanup does in my scripts. I may have to look into that some more and see how helpful it is. I am also running the NGEN updates for .NET in my script as well. I don’t like Mandatory Profiles because it has always seemed like a bunch of steps for a small payoff and more complication. Running sdelete never hurts but in this case on a fresh disk on a fresh image I question how much it’s actually helping.
I have a few problems with the order in which it tells you to do things and with some of the things it tells you to do. Like deleting user profiles without considering anything about the AppX apps. If you have logged into any of the other profiles you’re going to break your AppX manifest and then good luck doing a Sysprep after that.
The login times on that chart look great but it doesn’t say anything about the hardware infrastructure they’re using to get those numbers, if there are any AppStacks attached, if they’re using UEM/Roaming Profiles/Persona Management or even have any applications installed in the VM. All of those things contribute to that login time number. It’s an interesting read though and definitely gives me a few things to look into and think about.
Thanks for your comments on that article Shawn. I also found the order they did things to be strange.
Another quick question (sorry!); If using Instant Clones, how do you feel about joining the base image to the domain? I can’t wait for your future articles you have planned!
I don’t like joining Linked Clones to the domain but I believe you have to join Instant Clones to the domain to get GPO’s applied don’t you? I forget. Thanks for reading!
Hallo Shawn,
This is the best article.
First thanks a lot for taking effort to blog this.
This has helped me a lot and so thousands of others IT System administrators.
I was able to build the Windows 10 image successfully.
You don’t have to join the system to domain.
It is automatically taken care.
GPO will do the rest as long as Computer is properly chosen.
Some things I observed.
1. When we run the VDIDesktopShutdownScript.bat , we must use console rather in RDP. Because after DHCP IP is released, it is disconnected.
2. When you open windows optimization tool, by default it goes to windows 10 not your template. Sometime or rather I have ended up applying both the templates. Unsure if this is important for others. May be a silly mistake.
3. Sometime we build the image in lab. And when we don’t KMS we have to rely on old trick of disabling license check. May be you can add it.
4. Do you know if we have to do any special settings for Windows 10 activate via KMS server?
Thank you for the comment Preetam! I appreciate it.
1. Yeah you should run the script while connected to console OR just know that you will get disconnected, but it will continue running the script and it will automatically shutdown the VM.
2. You do have to select the correct template. Running both against the same image can cause some overlap and may not be a good idea.
3. Good call on the license check, I may add it in if I get a chance to do an update.
4. No special settings other than making sure your KMS server is using a proper key that can activate Windows 10 for the edition you’re using which should be Enterprise. Usually I run KMS from a Windows Server (2016 or above) and this means you have to use a Windows Server KMS key (2016 or 2019). Both of those keys enabled for KMS will activate Windows 10 Enterprise.
I hope that answers all your questions and thanks for reading!
Thanks for these – I’ve referenced them a lot. I’m trying to use this article while also creating a mandatory profile to speed up logins for a non-persistent environment (which if people are using UEM and AppVolumes, they are likely also using). How would this guide be modified to include the creation of a mandatory profile?
THanks!
Jeff
Thanks for reading and commenting Jeff! I haven’t used mandatory profiles much and to say exactly where in the guide they would fit would be a stretch since creating a mandatory profile could break all kinds of steps. If I had to guess I’d say somewhere after running the VMware OS Optimization Tool you could create a mandatory profile after you’ve cleaned up the temp user account and cleaned up the AppX apps using the scripts. This may be something you just have to test integrating into the process. This guy has several links and a portion of his guide details the steps needed to create a mandatory profile. https://www.carlstalhood.com/vmware-user-environment-manager/ I’ve read and used many of his articles in the past and he’s very thorough. I hope that helps and thanks again for reading!