
- Image Building Series – VM Configuration
- Image Building Series – Windows 10 Install
- Image Building Series – Windows Customization
- Image Building Series – VMware OS Optimization Tool
- Image Building Series – Apps & Drivers
- Image Building Series – Agents
Welcome to Part 4 of my Horizon View and Windows 10 Image Building Series. So far in this series we’ve built a virtual machine and customized it for use with Horizon View and Windows 10. We installed Windows 10 (1803) Enterprise, installed VMware Tools and ran Windows Updates. We also applied many customizations to Windows settings and options. Finally we’ve staged the Agents, Scripts and drivers we’ll need later. We also downloaded and staged the VMware OS Optimization Tool.
The VMware OS Optimization Tool is a VMware Fling that started out as a nice easy way to automate the previously manual/partially scripted process of optimizing Windows to work as a VDI desktop. In this article we’re going to explore how to run the tool and I’ve built a custom template that I’m sharing with you here for what I’ve found are the best settings for VDI. I’ll be using a numbered list so you can easily follow this guide while adding detail around specific sections where necessary.
VMware OS Optimization Tool
The VMware OS Optimization Tool is VMware’s recommended method to get a Windows 10 desktop ready for deployment as a VDI desktop with Horizon View. VMware’s PDF Guide for optimizing Windows 10 for Horizon View explains how to use the tool. If you haven’t used the tool before go read through that guide to familiarize yourself. Citrix has a similar tool called Citrix Optimizer but from what I’ve seen I don’t think it’s changes everything that the VMware tool does.
I’m assuming here that you’re following the series and you’ve already downloaded and staged the VMware OS Optimization Tool. If you haven’t then go get it now because you’re going to need it. First I’m going to walk you through running the tool on the image using my custom template. Then I’ll give you some detail around what it’s doing. Let’s get started!
- Browse to the directory you staged the VMware OS Optimization Tool.

- Download my custom Windows 10 – VirtuallyInclined template. You will need to rename this to an .XML file and place it in the same directory as the executable for the VMware OS Optimization Tool like the picture above.
- Right click VMwareOSOptimizationTool.exe and select Run As Administrator.
- If you placed my custom template in the same directory as the tool you should be able to select the Template drop down on the left and see my template under My Templates\Windows 10 – VirtuallyInclined.com.

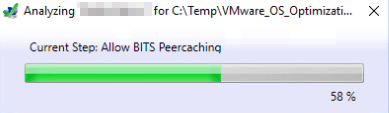
- Click Analyze and the tool will see which settings need to be applied.

- After it analyzes your image the tool displays what changes it’s going to make in an extremely long list. With some things checked or unchecked. I’ve built the template based on my most successful settings but if you’re comfortable you can also go through and manually customize what you want to be optimized on your desktop image. I tried to save you the trouble with my template. To understand what settings the tool changes continue reading below for more information.

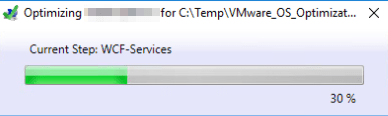
- When ready click Optimize to start the optimization process using my custom template.

- When the tool finishes running it will display the list again but this time telling you what it applied and if it was successful. Close the tool and Restart Windows when ready.

- Login to the local Administrator account.
- Run the VDIDesktopShutdownScript.bat from an Administrator elevated Command Prompt. We’ve already test run this before in the last article so it should go smoothly and shutdown the desktop.
- Take another snapshot of the VM at this point in case things break down later you can revert to a clean state.


VMware OS Optimization Tool Settings
So we just ran the VMware OS Optimization Tool and optimized our Windows 10 desktop image. You might be asking what we just did. There’s ~490 settings that potentially just got changed. If you tried using the tool to look at all those settings and want to know what it’s actually doing you aren’t alone. Some of them change things in the registry, some change scheduled tasks, some run commands to make things happen.
If you wanted to spend a bunch of time going through each individual setting in the tool you could. I decided to make that a bit easier. I extracted all of the settings from the tool and put them in a somewhat easier to read format in an Excel Spreadsheet. Click the link below to download it.
VMware OS Optimization Tool Settings
The spreadsheet contains every setting the tool uses to optimize a desktop. The first worksheet is all of the original settings as I extracted them from the tool. The following worksheets are my breakdown of each section and a Check indicator of whether or not the item is checked or not in my template. Red means the item is set to false, Green means the item is set to true. If set to true the tool applies the change.
I’d have to write another series of articles on many of the settings changes I made from the default templates and the reasons why. I will note though that the settings I have marked from Line 77-88 on the Registry Settings 1 worksheet must be not be set to true or your Start Menu won’t work reliably. The template reflects that and they are not set to true. VMware is aware of the issue and it’s supposed to be fixed in a later release of the tool.
VMware OS Optimization Tool Complete
We’ve successfully run the VMware OS Optimization Tool on our now heavily customized image using my custom template. I’ve also explored the extensive settings changes that the tool uses and provided a spreadsheet detailing all the items it touches during the optimization process. In the next article in this series we’re going to start installing Apps & Drivers on our image. Thanks for reading and stay tuned for the continuation of this series.
Hey Shawn, how are you? Great stuff here, thanks for your work.
Every time I try to load Windows-10-VirtuallyInclined.xml I receive the following error:
“Invalid character in the given encoding. Line 1205, position 116.”
The character at that location is an apostrophe ‘
I have tried removing this section and it fails on the next apostrophe.
I used notepad.exe, and have saved as .xml
Any assistance appreciated. Thanks!
Hey Sean thanks for reading and commenting! You should be able to just right-click Save As on the link and save it. You shouldn’t have to copy paste into Notepad. Try that and see if that helps.
Hey Shawn, just wondering if you have updated the xml for 1909 or not. If not, might you have an updated one you could upload?
My apologies, I haven’t updated the XML in a bit but I’ll try and get one created soon. I’ve got a lot of work to do in my lab haha. Thanks for reading!