
Welcome to Part 3 of my Horizon View and Windows 10 Image Building Series. So far in this series we’ve built a virtual machine and customized it for use with Horizon View and Windows 10. We installed Windows 10 (1803) Enterprise, installed VMware Tools and ran Windows Updates. All pretty basic stuff.
This article goes a bit deeper into customizing the instance of Windows 10 to be suited for VDI with Horizon View. We’ll be setting a variety of Windows settings and options as well as staging the agents and components we’ll need in later articles. I’ll be using a numbered list so you can easily follow this guide while adding detail around specific sections where necessary.
Thanks again!?
I want to first give a huge thanks to Lieven D’Hoore over at https://www.ituda.com/. I’ve been using his Image Creation guides for years. Starting with his Windows 7 guide and then moving over to his Windows 10 Golden Image Creation article. He was gracious enough to allow me to use portions of his guides in my content here. I’ll hopefully be able to do it justice and add some of my own flavor to it. That guy lives and breathes EUC and technology, Go check out his site!
If you read the last two articles you’ll notice the above was copied directly from them. I like giving credit where it’s deserved and it’s definitely still deserved.
Windows Customization
We left off in the last article finishing up Windows Updates and restarting. I’m breaking this series up into 14 different tasks we need to complete with steps underneath each. Each step is important and likely will be a prerequisite for steps in later articles of this series so I don’t recommend skipping anything unless you really know what you’re doing or have read through the entire series to know what you can skip. Let’s get started!
-
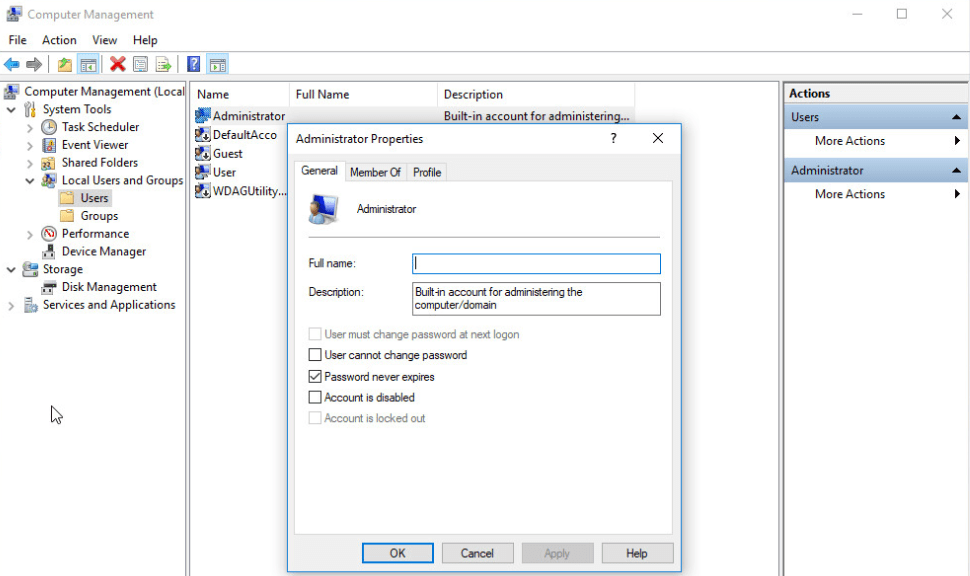
- Administrator Account – The Administrator account is not enabled by default. We don’t want a randomly named temporary account sitting around so we need to enable the local administrator account before we can do something about it. Note: DO NOT delete the temporary account at this step. We will delete it in a later article in the series.
- Logon using the temporary User account we created in the last article.
- Open up Computer Management by right clicking on the Start Menu. Click the Local Users and Groups section on the left. Click the Users folder underneath.
- Right click on the Administrator account and select Properties.
- Uncheck Account is disabled and click Ok.

- Right-click the Administrator account and select Set Password.
- Click Proceed on the dialog warning and then enter a password for the local Administrator account.
- Click Ok.

- Close Computer Management and Restart Windows.
- Log back into Windows 10 but this time using the local Administrator account that we just re-enabled.
- Time Zone – The Time Zone setting is surprisingly important unless you live in the Pacific time zone which is the default. Of course you can also control this later by GPO and NTP on your domain somewhere but for our purposes we set it here to make sure it’s set correctly from the outset.
- Click the Settings gear on the Start Menu
- Select Time & Language then select Date & time on the left side.
- Select the proper Time zone from the drop down list
- Set time zone automatically to On


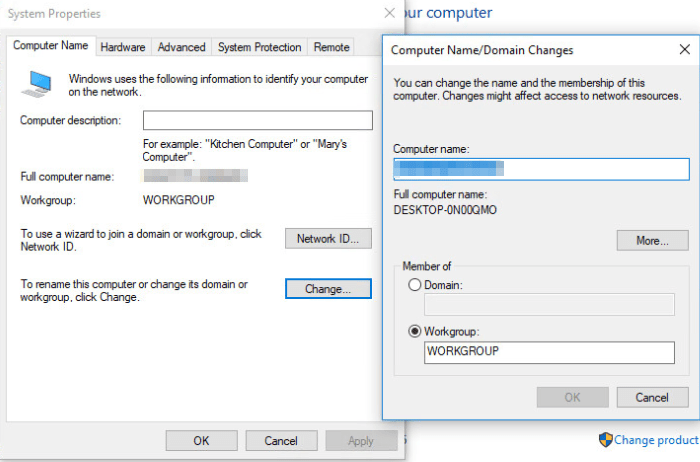
- Change Computer Name – We don’t necessarily have to change the computer name. I typically do for uniformity, so it looks nice and so we know what it is later. Pick something that you’ll easily recognize once it’s joined to the domain.
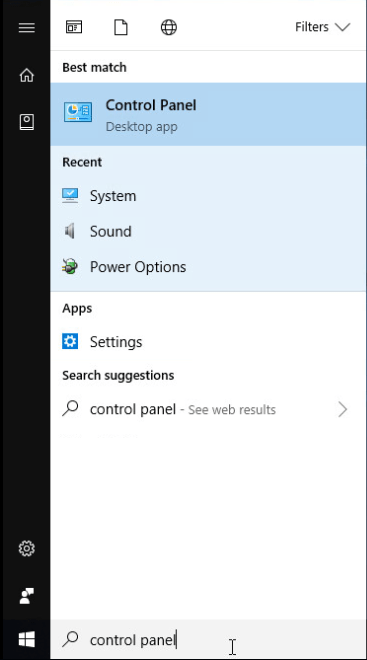
- Click the Start Menu and type Control Panel in the search box then select Control Panel from the results.

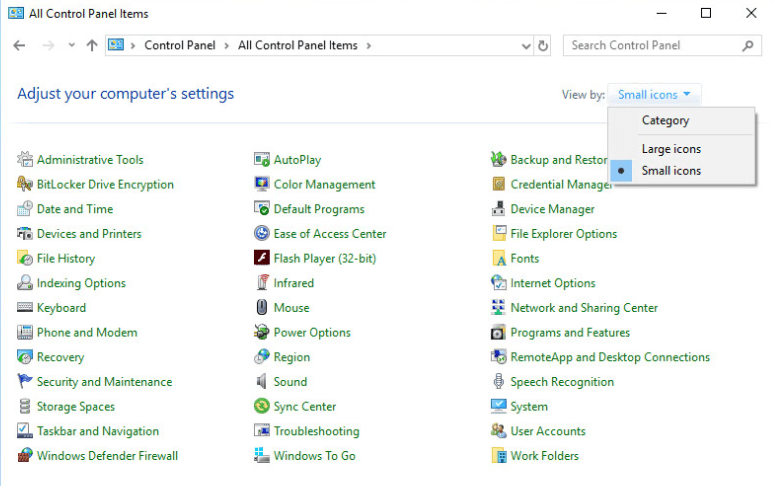
- On the right side change the View by drop down to Small Icons and select System.

- Click Change Settings in the Change Computer name, domain and workgroup settings section. I don’t like the new Windows 10 way that you can also use to accomplish this so I’m taking you through my steps instead.
- Click the Change button and enter a new Computer name then click Ok.
- Click Ok again then click Close and select Restart Now for the change to take effect.

- Log back into Windows using the local Administrator account.
- Click the Start Menu and type Control Panel in the search box then select Control Panel from the results.
- Temporary Accounts – DO NOT delete any temporary accounts yet. You could break AppX packages if you don’t follow this step. Read my AppX article for more info. It contains rules to follow and one of those is don’t delete the temporary account until you’ve run the scripts. In this case we are not ready to run the scripts. We will do so in a later article in this series. For now just be safe and don’t delete the temporary accounts.
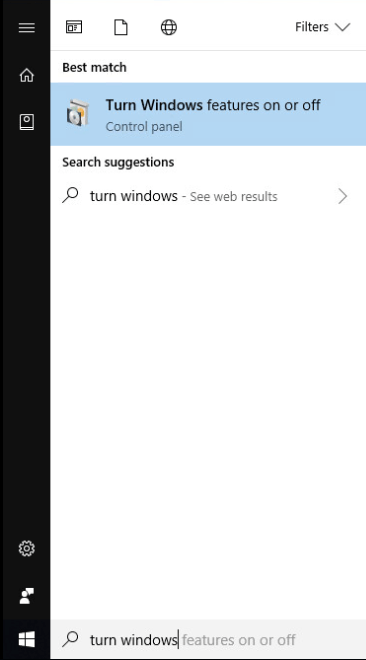
- Turn Windows Features on or off – There’s a couple of things we need to change with the base Windows Features. These typically aren’t critical but could be in certain situations.
- Click the Start Menu and type Turn Windows. From the results select Turn Windows features on or off.

- Check .Net Framework 3.5 (Some legacy applications always seems to need it).

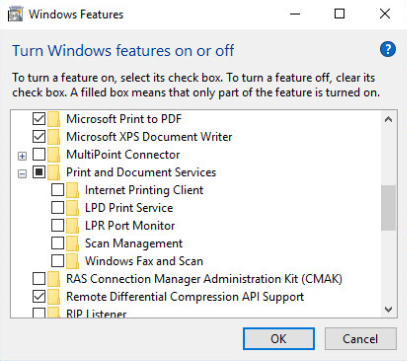
- Scroll down a bit and uncheck Internet Printing Client and Windows Fax and Scan (unless you need them for some reason).

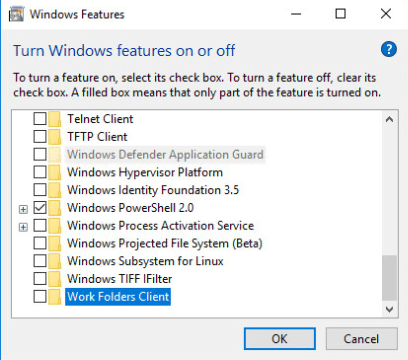
- Scroll to the bottom and Check Telnet Client (optional nice to have).
- Lastly uncheck the Work Folders Client.
- Click Ok.

- Select Let Windows Update download the files for you.

- The Windows Features you changed will be installed or uninstalled at this point. Restart Windows when they are finished installing.
- Log back into Windows using the local Administrator account.
- Click the Start Menu and type Turn Windows. From the results select Turn Windows features on or off.
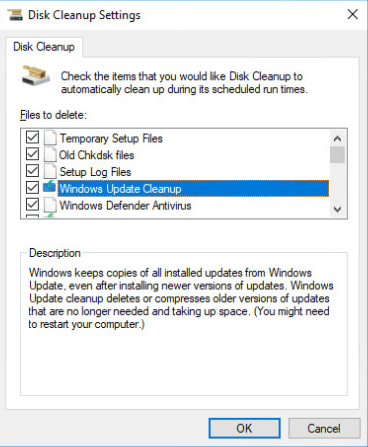
- Disk Cleanup Settings – Most everyone has seen Disk Cleanup in Windows and probably uses it regularly, but you may not be aware that you can predetermine all the cleanup settings. Doing this allows you to run Disk Cleanup in an automated fashion called from a script. I have actually adapted a shutdown script that we’ll go over later that will run Disk Cleanup for us when prepping the image.
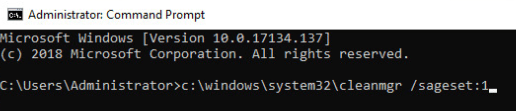
- Open an Administrator elevated Command Prompt and run the following command.
C:\Windows\System32\cleanmgr /sageset:1

- Check everything in the list unless you have a specific reason not to. Make sure to scroll down and click Ok.

- That’s it for this task. Once you click Ok you can close the Command Prompt and move on to the next task.
- Open an Administrator elevated Command Prompt and run the following command.
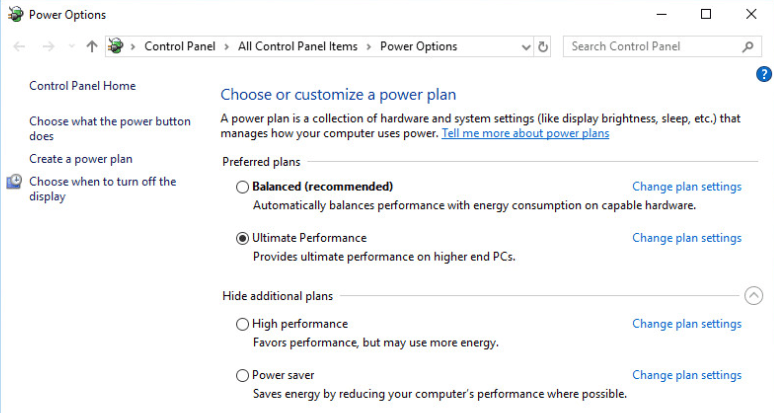
- Power Options – We want the VDI desktops to run at full performance all the time. We don’t need power management slowing us down here so we’re going to kick this desktop into high gear. With Windows 10 (1803) they’ve moved the dial up a bit with a new Power Plan.
- Click the Start Menu and type Power Plan. From the results select Choose a Power Plan.

- Select Ultimate Performance (New on 1803) Check this article for more info.

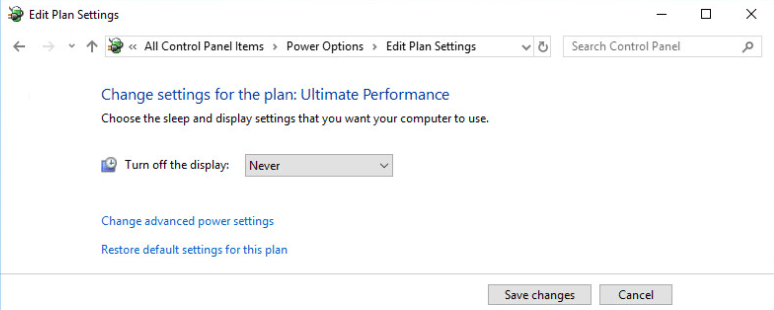
- Click Change plan settings to the right of Ultimate Performance.
- Set Turn off the display to Never. This is an important step because we don’t want the VDI desktop controlling when the screen goes off.
- Click Save Changes and close Power Options.

- Click the Start Menu and type Power Plan. From the results select Choose a Power Plan.
- Configure Page File Size and RDP Settings – There are many opinions on whether you should even have the PageFile enabled or not all over the internet. I’ve had good luck having the pagefile enabled and setting it to the same size as the memory available on the desktop. We’re also going to enable RDP here because it’s required.
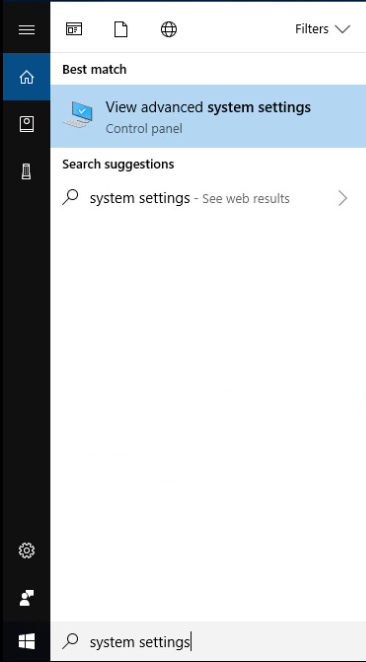
- Click the Start Menu and type System Settings. Select View advanced systems settings from the results.

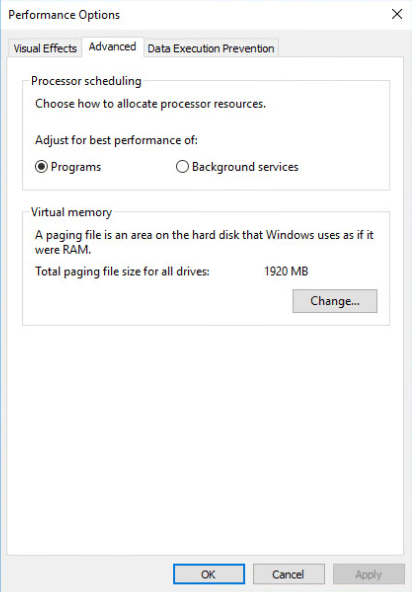
- On the System Properties dialog click the Advanced tab. In the Performance section click the Settings button.

- On the Performance Options dialog click the Advanced tab. In the Virtual Memory section click the Change button.

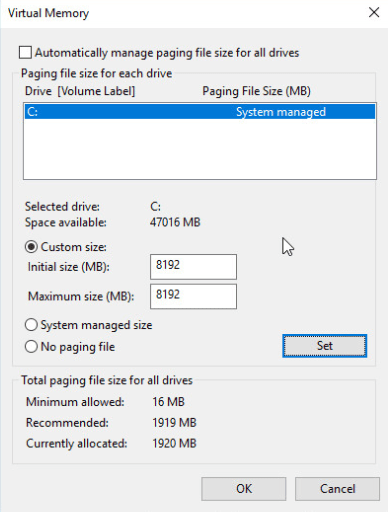
- Uncheck Automatically manage paging file size for all drives. We’re going to explicitly set the size by clicking the Custom Size radio button.
- Set Initial size and Maximum size to equal the total amount of RAM assigned to the VM. Take the total GB and multiply by 1024. Ex; 1GB=1024, 2GB=2048, 4GB =4096, etc. In this case the VM has 8GB of RAM so it’s 8192MB.
- Click the Set button. NOTE: If you click Ok without clicking the Set button it will not change the page file size.
- Click Ok to close the Virtual Memory dialog.

- To close the Performance Options dialog click Apply and Ok.
- On the System Properties dialog click the Remote tab.
- In the Remote Assistance section uncheck Allow Remote Assistance connections to this computer.
- In the Remote Desktop section select Allow remote connections to this computer.
- Click Ok to close System Properties dialog.

- Since we made changes to the pagefile, Windows wants to restart but for now we will click Restart Later.
- Click the Start Menu and type System Settings. Select View advanced systems settings from the results.
- Registry Changes to enable Verbose Status messages upon Logon – Verbose status messages tells us what’s going on during user login. It can help with troubleshooting excessive login times by telling us what step in the login process Windows is getting stalled on.
- Open an Administrator elevated Command Prompt and run the following command.
REG ADD "HKLM\Software\Microsoft\Windows\CurrentVersion\Policies\System" /v verbosestatus /t REG_DWORD /d 1 /f
- Open an Administrator elevated Command Prompt and run the following command.
- Stage the VDI Desktop Shutdown script – I’ve adapted and slightly changed a script that Lieven D’Hoore over at https://www.ituda.com built. I’ve added some commands in there to have it announce what step it’s on. I’ve also changed the Event Log cleanup command and added a step to disable the App Volumes service. Here we need to copy the script below and paste it into a text file to stage it on the desktop image. We’ll be running it later to clean up the image and remove unnecessary files.
-
- Copy the batch file to the image but DO NOT run it yet.
- NOTE: There’s a section towards the bottom that is for you to use if you happen to be using Anti-Virus on your VDI Desktop. Most AV makers attach an ID to each desktop and for non-persistent clones that can cause issues with their licensing. To fix that they have tools that can generalize the Anti-Virus software for non-persistent desktops. We’ll talk more about this later.
@ECHO VirtuallyInclined.com VDI Desktop Shutdown Script @ECHO Originally created by ITuda.com @TIMEOUT /T 7 @ECHO ************************************************ @ECHO Stopping AppVolumes SVC from delaying shutdown @ECHO ************************************************ @TIMEOUT /T 3 net stop svservice @ECHO ************************************************ @ECHO Pre-Compiling .NET Framework Assemblies @ECHO ************************************************ @TIMEOUT /T 3 C:\Windows\Microsoft.NET\Framework\v4.0.30319\ngen.exe update /force @ECHO ************************************************ @ECHO Deleting Volume Shadow Copies @ECHO ************************************************ @TIMEOUT /T 3 vssadmin delete shadows /All /Quiet @ECHO ************************************************ @ECHO Deleting downloaded Windows Update files @ECHO ************************************************ @TIMEOUT /T 3 del C:\Windows\SoftwareDistribution\Download\*.* /f /s /q @ECHO ************************************************ @ECHO Deleting hidden Windows and Windows Update @ECHO install files @ECHO ************************************************ @TIMEOUT /T 3 del %windir%\$NT* /f /s /q /a:h @ECHO ************************************************ @ECHO Deleting Windows prefetch files @ECHO ************************************************ @TIMEOUT /T 3 del c:\Windows\Prefetch\*.* /f /s /q @ECHO ************************************************ @ECHO Running Disk Cleanup to empty recycle bin, @ECHO remove temp files and other unneeded files @ECHO Note: You must run @ECHO "c:\windows\system32\cleanmgr /sageset:1" @ECHO on your parent image and check the items you want @ECHO to delete @ECHO ************************************************ @TIMEOUT /T 3 c:\windows\system32\cleanmgr /sagerun:1 @ECHO ************************************************ @ECHO Defragmenting VM disk @ECHO ************************************************ @TIMEOUT /T 3 sc config defragsvc start= auto net start defragsvc defrag c: /U /V net stop defragsvc sc config defragsvc start = disabled @ECHO ************************************************ @ECHO Clearing all event logs @ECHO ************************************************ @TIMEOUT /T 3 for /f %%a in ('WEVTUTIL EL') do WEVTUTIL CL "%%a" @ECHO ************************************************ @ECHO Run anti-virus cloning tool here @ECHO ************************************************ @TIMEOUT /T 3 @REM <Insert path to executable here and remove REM> @ECHO ************************************************ @ECHO Releasing DHCP IP address @ECHO ************************************************ @TIMEOUT /T 3 ipconfig /release @ECHO ************************************************ @ECHO Flushing DNS Cache @ECHO ************************************************ @TIMEOUT /T 3 ipconfig /flushdns @ECHO ************************************************ @ECHO Shutting down the VM @ECHO ************************************************ @TIMEOUT /T 3 shutdown /s /t 0 -
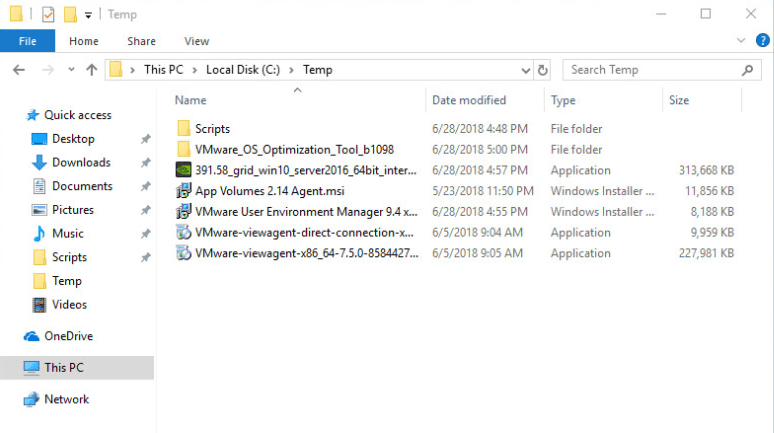
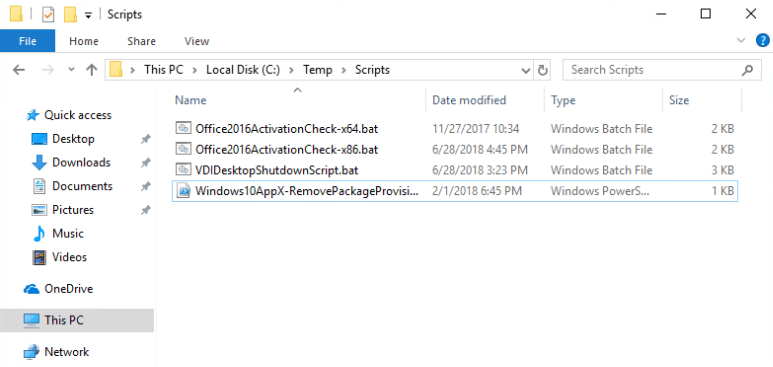
- Stage Agents, scripts and software installs – There’s some software that we need to get together and I like to put it on the image. When you run updates to Windows or applications on the image they can cause issues with the agents and you may need to reinstall the agents to fix it. So I stage them locally on the VM to make that process easier.
- You can either copy the agents and drivers directly to the image, which I usually do to easily keep track of what versions are installed. You could also stage them together on a network share as long as it’s accessible from the image.
- Agents includes View Agent, View Direct Connect Agent, App Volumes agent, User Environment Manager agent and NVIDIA GRID drivers if applicable.
- Other items may include Printer Drivers, USB device drivers, anti-virus and anti-malware software.

- I include the VDI Desktop Shutdown script from above. I also include the AppX removal scripts from my AppX article that you hopefully took a look at. I also include an Office 2016 Activation check and rearm script. This could also be adapted for other versions of Office. This only applies to the Volume Licensed versions. The paths in the script are for the 64-Bit version so if you are using the 32-Bit version you need to change the paths.

- Copy the below to a batch file on the image and you can call it OfficeActivationCheck.bat or something like that.
- The Script shows you if a DCMID exists for Office and if it does you need to Rearm. We will run this in a later article.
@ECHO VirtuallyInclined.com Office 2016 Activation Check & Rearm Script
@TIMEOUT /T 7

@REM ****************************
@REM Check Office 2016 Licensing Status
@REM ****************************
@CD "C:\Program Files\Microsoft Office\Office16\"
cscript.exe ospp.vbs /dstatusall
@REM ****************************
@REM Check Office 2016 DCMID Status
@REM ****************************
@CD "C:\Program Files\Microsoft Office\Office16\"
cscript.exe ospp.vbs /dcmid
@ECHO *******************************************************************************
@ECHO *** If these commands show "LICENSED" and the "Client Machine ID" is populated
@ECHO *** then you will need to REARM Office 2016
@ECHO *******************************************************************************
@ECHO OFF
@CHOICE /T 10 /D N /M "Do you want to REARM Office 2016?"
@If Errorlevel 2 Goto No
@If ErrorLevel 1 Goto Yes

:No
@Goto End

:Yes
@CHOICE /T 10 /D N /M "ARE YOU SURE YOU WANT TO REARM OFFICE 2016?"
@If Errorlevel 2 Goto No2
@If ErrorLevel 1 Goto Yes2

:No2
@Goto End

:Yes2
@CD "C:\Program Files\Microsoft Office\Office16\"
ospprearm.exe
@PAUSE
@Goto End
- Download and stage the latest version of the VMware OS Optimization Tool. You can get it from the VMware Flings site. We’re going to run this in the next article so it’s important to have it staged here.

- Run Windows Update and run the shutdown script
- Run Windows Update again to make sure it’s completely up to date.
- Restart Windows and login as the local Administrator.
- Run the VDI Desktop Shutdown Script that we staged earlier from an Administrator elevated Command Prompt. This will be your first test run of the Shutdown script to make sure it doesn’t have any issues. Let it run, it may take a while. NOTE: I’ve seen it occasionally hang up while running the Disk Cleanup portion. Sometimes it just takes a while. Other times I’ve had to end the Windows Installer process. When this happens I typically reboot and run the script again.
- Upon completion of the script the VM will be shutdown.
- Disconnect Windows 10 ISO from the VM – We want to make sure there are no ISO’s connected that could cause issues later.
- Open vSphere Client and right-click the VM and click Edit Settings.
- On CD/DVD Drive 1 change the drop down to Client Device then click Ok.
- Snapshot the image – Time for another snapshot of the VM. We can step back to this snapshot in the case that something breaks later. Make sure you set a descriptive title and description of the snapshot so you know what it’s for.
- Administrator Account – The Administrator account is not enabled by default. We don’t want a randomly named temporary account sitting around so we need to enable the local administrator account before we can do something about it. Note: DO NOT delete the temporary account at this step. We will delete it in a later article in the series.


Windows Customization Complete
Alright, we’ve customized the Windows 10 image with all the necessary Windows settings. We’ve also staged the Agents, drivers and scripts necessary to continue working with the image. In the next article we’re going to run the VMware OS Optimization Tool and do a bit of a deep dive on the settings it can change. Thanks for reading and stay tuned for the continuation of this series.
Hallo Shwan, Might not be the right forum/place to put this but just in case, would you know where to check the logs during windows login screen.
I have followed your blog posts (all 4) and now I’m at situation that Windows 10 takes minimum 30 seconds to login. 27 secs it waits on preparing and 3 sec (group policy and others). It is persistence desktop
Unfortunately there’s several things that could be causing this. You will have to roll through a process of elimination until you see what’s going on. Sometimes it’s GPOs, sometimes it’s App Volumes, sometimes it’s bad optimizations or sometimes it’s things like Active Setup components in Windows. All or any of those can cause this type of slowdown and unfortunately you have to eliminate them one at a time to identify what the issue is. I wish I had a better answer. You could turn on verbose login and it should identify to some degree what the culprit is but it’s not always accurate. Good luck and thanks for reading!
That guide is really good. I used it and everything is working so far.
But im a bit confused about that Office rearm stuff.
So you run ospprearm.exe every time you did an update, and then shutdown.
Aren’t you normally running out of rearms then? I mean, MS says:
“You can rearm five times, unless you activate Office by using a KMS host computer. If you run out of rearms, activating by using a KMS host computer lets you rearm once.”
That means you can rearm 5+1 (=6) times when using KMS, which we do. (??)
Source:
https://docs.microsoft.com/en-us/deployoffice/vlactivation/rearm-an-office-installation-on-an-image-when-using-kms-to-activate
So does that mean you run out of rearm count in the master image?
Thats what im a bit worried about. I did not rearm that often yet, only a couple of times.
Thanks for reading and commenting! The reasons for all the snapshots hopefully now becomes evident. It gives you the power to go back to a previous snap (before Office activation) and run updates, etc. without running out of rearms. If you don’t leverage the snapshots though the activation through KMS will ALWAYS reset the rearms to 1, so even if you do run out, activating via KMS will reset the count to 1 regardless of if it’s 6 or 60 times you’ve rearmed. Thanks again for reading!